The Kitchen Witch Blog: The recipes and ramblings of a biker chick
HomeThe Kitchen Witch Blog: The recipes and ramblings of a biker chickRecipesRamblingsRhondaShopContact UsRecipes
The Kitchen Witch Blog: The recipes and ramblings of a biker chick
  • Motorcycle Monday: A Memorial

    May 30, 2011 by Giggles

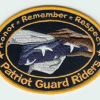
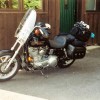
    One of the things that I love about biker’s is that they are some of the most patriotic people I know.  Bikers are proud to be Americans.  They love their freedoms probably more than anyone.  More than being proud of being American and enjoying their freedoms, Biker’s appreciate the people who made and continue to make it happen.

    I’ve included some links on biker organizations that show how proud they are to be American and how passionately they care for the men and women of the United States Military, the people who sacrificed their lives so we could enjoy a Memorial Day Weekend.

    This Memorial Day, while you BBQ, drink beer and spend time with your friends and family, take a moment to remember the men and women who died for our freedoms.  And remember there is a biker(s), right now doing something to memorialize our fighting force.

    image

    Rolling Thunder

    image

    Combat Veterans Association

    image

    U. S. Military Vets

    image

    Warrior Brotherhood

    image

    Veterans of Vietnam

    image

    Patriot Guard riders (one of my personal favorites)

    image

    Green Knights

    image

    Knights Paladin

    image

    Military Veterans MC

    image

    POW-MIA Riders

    image

    Leathernecks MC

    image

    American Legion Riders

    image

    In Country Vietnam MC

    image

    Purple Heart Riders

    image

    Bikers of Baghdad

    There are many more organizations, local and national, check one out near you.

    Not biker related but here’s a site about American Battle Cemeteries overseas.

    image


  • Shrimp and Pancetta Spaghetti

    May 25, 2011 by Giggles

    Shrimp & Pancetta Spaghetti

    Ask my family what their favorite Seafood is?  Shrimp, they’ll cheer!  Ask my family what their favorite starch is? Pasta, they’ll cheer!  Ask my family what their favorite meat is?  Bacon they’ll cheer!  Ask the doggies what’s their favorite?  And they’ll cheer, EVERYTHING!

    Poor Summer thinks she’s a Circus dog, until she looses her balance and tips over.

    McGyver and I couldn’t stop laughing!

    DSC_0324DSC_0325DSC_0329

    Summer dog finally succeeded, but then she thought every noodle was for her.

    DSC_0327

    Becca dog had something different in mind (see those greedy little eyes?).

    DSC_0331

    I couldn’t go wrong with Shrimp, Pancetta and Spaghetti.

    Shrimp and Pancetta

    Recipe

    Shrimp and Pancetta Spaghetti

    • 16 oz. dried spaghetti noodles, cooked
    • 3 oz. pancetta, diced
    • 1/4 cup olive oil
    • 2 tbsp. butter
    • 2 to 3 cloves garlic, minced
    • 8 oz. peeled shrimp
    • 1 tbsp. chopped fresh thyme
    • Juice of 1 lemon
    • Salt and pepper, to taste
    • 1/2 cup grated parmesan, plus more for the table
    • 1/4 cup toasted bread crumbs

    In a large fry pan, cook pancetta over medium high heat until crispy.  Using a slotted spoon, remove from pan and drain on a paper towel.  Set aside.  To the left over fat add olive oil and butter.  Saute the garlic for approximately 2 minutes.  Add shrimp, thyme and lemon juice.  Cook until the shrimp turns pink.  Add the noodles, pancetta and cheese.   Toss/mix well. Add salt and fresh ground pepper to taste.  Serve immediately and top with toasted bread crumbs and extra parmesan cheese.


    Click to Print a Recipe Card


  • Motorcycle Monday: FLEAS

    May 23, 2011 by Giggles

    There’s a first time for everything, this time I’m actually reposting some from another blog.  I’ve never done it before but this good advice must be shared!  I can’t tell you how many times I’ve seen bikers packed up for a long trip and I looked at their packing job and thought to myself, what the heck?  There’s no way they are going to make it.  Items piled high, things not distributed evenly, basically just a mess!  I’ve even been with someone, in my early days, who didn’t have a clue and we’ve had to stop to readjust the gear, inconvenient, yes, but worse….not safe…and even I have not been smart about packing gear.  I didn’t secure a gym bag properly and had it slip to the side and my tires rubbed through my bag.  I count myself lucky that the bag didn’t get caught in my tires and cause a more serious problem.  Truth is, people will see that you’ve left a buckle undone, a strap will come loose or things will shift and no one will wave you over to let you know.  McGyver and I have done this many times knowing the danger of improperly packed bike.  When I saw this post on Biker Chick News, I just knew I had to share it too.

    Traveling? Load your bike with FLEAS!

    by Corn Dog on May 20, 2011
    in Travel Tips

    1 Comment

    Whether you’re already an expert, or brand spankin’ new to traveling long distances on a motorcycle, it’s important to know how to properly pack and load your bike. Your goal, of course, is to maintain the bike’s overall balance and center of gravity so that maneuvering isn’t any more difficult with the added weight of luggage and stuff.

    Like every good problem-solver these days, I’ve devised an acronym to help remember how to most effectively pack the bike for a trip. So get ready to pack your bike with FLEAS!!

    Forward - Keep your load forward, meaning over or in front of the rear axle when possible. A load that is too far to the rear can affect turning or braking, or cause the bike to wobble. Use common sense,  of course: a tankbag, while certainly forward, should not interfere with your ability to manage steering or hand controls.

    Low - Keep your load low, meaning inside saddle bags as much as possible. Of course, this isn’t always possible – just remember that a load carried on the passenger seat should not be stacked too high, and should not be allowed to shift when traveling. (When we traveled to Sturgis, I had to learn to swing my throw-over leg over the luggage bungeed to the sissy bar, but I didn’t feel like the bike was unbalanced. It felt like I had a lightweight passenger on the back.)

    Even - Distribute weight evenly between saddlebags so the bike doesn’t want to list left or right.

    Accessible - Keep important items accessible even when the bike is packed. Rain gear, cell phone, tool kit, camera… whatever is on your must-have list should be available easily when you stop for a break, so you don’t have to unpack the whole bike just to get to them.

    Secure - Goes without saying you should batten down the hatches as completely as possible, especially if you have a T-bag, roll-bag, or other “loose luggage” to attach to the bike. I use multiple bungee cords, criss-crossing them over the bags and making sure they are super-snug. It’s also helpful to know your bungee plan when using multiple cords.

    And always, keep the Rubber Side Down and FLEAS on your bike…Giggles.


  • Green Onion and Dill Dip

    May 19, 2011 by Giggles

    DSC_0065

    Summertime (or near summertime if you live in Montana), makes me naturally want to eat lighter.  I’m a big veggie lover, more veg than fruit please!  However, my vegetable drawer has been known to have many a vegetable lay in waste…wanted but forgotten.  That’s where the guilt comes in, the truth is that my veg go bad because I am just too lazy to take the time to make it ready to eat (unlike fruit which is almost always nearly ready to eat after a wash and/or peel.

    If I actually take the time to wash and cut my vegetables, they seem to have no problem disappearing, especially when I have a dip on hand.  Green onion and dill dip is so simple to make with few ingredients, just enough to bring out the flavor but not mask the deliciousness of a fresh vegetable.

    Recipe

    Green Onion and Dill Dip

    • 1 cup sour cream
    • 1 cup mayonnaise
    • 3 to 4 green onions, whites and green parts minced
    • 3 tbsp. minced dill weed
    • 1 clove garlic minced
    • Kosher salt and fresh ground black pepper to taste

    Mix all ingredients well, refrigerate for a minimum of 1 hour prior to serving.  Serve with fresh vegetables or chips.  It’s great on fish too!


    Click to Print a Recipe Card


  • Motorcycle Monday: Biker gear

    May 17, 2011 by Giggles

    Here’s some girl gear to add to your shopping list.

    image

    Draggin Jeans what’s so great about these?  When the weather is too hot for chaps and you aren’t into the armored look, these jeans provide the protection, yet still look like a regular pair of jeans.

    image

    Denim Chaps can’t bear to part with chaps?  Try these denim chaps for a different look and feel.

    image

    GoGo Gear This site isn’t for everyone, but if you ride to work and need to still look professional and stylish, this is the site for you.

    image

    Classic Jacket for the more traditional gal.  This jacket is a steal at $89.95, as a matter of fact Leatherup.com is filled with a zillion great deals.

    image

    Dingo Boots What I love about this pair of boots?  Cowgirl meets biker girl, perfect for this Montana biker!

    image

    3C%3Eprd_id=845524448774643&FOLDER%3C%3Efolder_id=2534374309252069&ASSORTMENT%3C%3East_id=2534374309252069&bmUID=1305503307996&bmLocale=en_US" target="_blank">Eye protection Hands down the best riding glasses I used to own…let’s just say that McGyver accidently broke them and we’ll leave it at that.  What I loved about them:  they fit my pin head, even with my helmet on, the lenses could be switched from clear to tinted and the foam rim is easily removed to convert them from goggles to sunglasses.  They bear the Harley logo and price tag, but they are the best!


  • Brown Sugar and Smoked Sea Salt Brussels Sprouts

    May 13, 2011 by Giggles

    Brown Sugar and Smoked Sea Salt Brussel Sprouts (2)

    Some foods have a hard time “wowing” people, the poor Brussels sprout, happens to be one of those foods.  The Brussels sprout is a vegetable that seems be on the you either love ‘em or hate ‘em lists.  I admit, I used to hate them.  My first introduction came from high school sweetheart’s Mom.  Just plain boiled and served up next to a steak.  After my first taste, well, let’s just say that it took me decades before I would give them another go.

    My favorite way to have Brussels sprouts is oven roasted, until now.   Brown Sugar and Smoked Sea Salt Brussel SproutsWhile shopping at my favorite kitchen store, this little jar of smoked sea salt caught my attention.  I purchased it and tucked it away in my cabinet, waiting for that special inspiration to come.

    Little did I imaging that it would come in the version of a Brussels sprout.  Like I said, my go to version of Brussels sprouts is oven roasted, but this night my oven was occupied.  An alternative was needed if I were to time my meal appropriately.

    With the oven not an option, that left the stove top.  Hmmm, pan fried Brussels sprouts, it sounded good and I could get some of that brown crispiness that I adore from oven roasting.

    I halved the sprouts, fried them in some butter, added some brown sugar for sweetness and caramelization; I was ready to salt and pepper, when my hand reached past the jar of smoked sea salt….

    Sweet and smoky and salty…a well known winning combination.  When I served the sprouts to McGyver, “WOW” he exclaimed, these are the best, hands down, no kidding, Brussels sprouts I’ve ever had!  Now the Baby boy had a different opinion, but we won’t listen to the sprout haters of the world.

    Recipe

    Brown Sugar and Smoked Sea Salt Brussels Sprouts

    • 1 lb. Brussels sprouts, halved
    • 2 tbsp. butter
    • 1/2 tsp. or more of smoked sea salt
    • 2 tbsp. brown sugar
    • fresh ground black pepper

    Place Brussels sprouts in a microwave safe bowl with 1 tbsp. of water.  Microwave on high for 3 minutes.  In a non-stick skillet, heat butter over medium heat, add the halved sprouts.  Cook the sprouts for an additional 5 minutes, stirring occasionally.  Sprinkle the sprouts with the brown sugar and smoked sea salt.  Cook for an additional 2 minutes or until the sugar begins to caramelize and brown.  Finish with some fresh ground black pepper and sprinkled with additional brown sugar.


    Click to Print a Recipe Card


  • Three Pepper Refried Beans

    May 11, 2011 by Giggles

    Refried Beans

    I have a secret, I’ve had it for months and I haven’t shared it…until now.  I bought an electric pressure cooker.  Truth is, I couldn’t take it anymore.  Sam at work kept ranting and raving about how great an electric pressure cooker is.  So easy, so great, so wonderful that it makes a crock pot passé.

    I don’t own ever kitchen gadget but I have my fair share.  Truth is pressure cookers scared me.  I was afraid they would blow up.  After checking out the latest technology, my mind was put at ease. 

    I had $25 dollar gift card from Chefs.  I’ve had it since November, 4 months of pondering what to get.  Well, Sam you sold me.  I ordered my pressure cooker and used it for the first time on March 17th . I made corned beef and cabbage.  Wonderful, loved it. 

    Pressure cookers and beans are a marriage made in heaven.  No more soaking beans over night and cooking for hours!  Just pick the beans over and rinse (don’t ever skip this step), pop them in the cooker and less than an hour later the beans are done.  Perfect for this procrastinator.

    Refried Beans (2)

    (Sample of bad beans and pebbles that could be in your beans, yuk!)

    Refried Beans (4)

    (Sample of good beans, yum!)

    Recipe

    Three Chili Refried Beans

    • 1 lb. dried pinto beans
    • 1 dried guarillo pepper
    • 1 dried New Mexico pepper
    • 1 dried arbol pepper
    • 8 cups water
    • 3 tbs. bacon fat, lard, or oil divided
    • 1/2 cup chopped onion
    • reserved cooking liquid
    • salt to taste

    Carefully pick over beans, look for and discard any broken or shriveled beans, bits of dirt and debris.  Rinse and drain beans.

    Add beans to the pressure cooker.  Add 1 /12 tbsp. bacon fat, dried peppers and water to beans.  Cook on high pressure for 35 minutes (or follow the manufacture’s instructions).  Allow pressure to release naturally.  Do NOT attempt to remove a pressure cooker lid prior to all the pressure being released (refer to your owner’s manual for complete instructions). 

    Drain the beans, reserving the liquid and the dried peppers (if desired).  In a large heavy duty frying pan, heat the remaining fat over medium heat, add the onions and cook until the onions are translucent and tender.  Add the cumin and cook for 30 more seconds.  to the onions and cumin, add 2 cups of the beans and mash well with a potato masher, continue to add beans in batches and mash.  Add cooking liquid as necessary for desired consistency, salt to taste.  Optional: chopped up the cooked peppers and add to the beans, stir well to incorporate.


    Click to Print a Recipe Card


  • Motorcycle Monday: My First Solo Ride

    May 9, 2011 by Giggles

    I successfully completed the Motorcycle Safety Foundations Beginner’s Riders course and got my endorsement on my license.  You can read about that here.  Call me brave, call me stupid, mostly call me ignorant.

    McGyver was still living in Germany, I had bought and moved into our new house in Shiloh, Illinois.  Most of the household goods came with me, including the 1998 Harley Davidson Super Glide.  The bike that made me start to fall in love with McGyver, you can read about that here.

    While we were living in Germany, McGyver ordered a brand new 2003 Road King, not realizing that I was working with our dealer to order me a 2003 Low Rider.  When McGyver announced that he ordered a new bike, I knew that my plans for a new bike would have to wait.  I didn’t want to start our life off with two motorcycle payments, a car payment and a mortgage.  I wasn’t too happy that neither of us had communicated each others intentions, and I was even unhappier that McGyver beat me to the punch.

    That’s not the worst of it, McGyver announced that he was going to sell the Super Glide to help off set the cost of the Road King.  WHAT????  We fell in love on that bike, how could you??????

    Honeymoon Harley(The Super Glide packed up for our honeymoon)

    I couldn’t bear to let it go so I offered to buy it.  Yep, buying the bike from my own fiancée, I’m an independent woman.  I wanted a bike, I wanted to keep the Super Glide, he wanted money for his bike, so we struck up a deal and that’s how the bike ended up with me when I got stationed in Illinois.

    I’m also an impatient woman, impatience can aid in some rash and poor choices.  I’d like to say this time it was different but it wasn’t.  With new license in hand I decided that I was going to take a spin around the neighborhood. I was going to stick to the subdivision to practice my skills before I went out into traffic.  I’m sounding pretty reasonable right now, don’t you think?

    I remembered everything McGyver taught me about starting the bike.  Make sure you are in neutral, pull the choke out,  flip the on switch, push start and roll back on the throttle.  Bada-boom bada-bing, she started right up.  While the S-glide was warming up, I put on  my helmet and gloves, safety first, safety always.

    I threw my leg over the bike and sat it upright and tucked in the kick stand.  Nothing had been modified yet, it had buckhorn handle bars and sat pretty high (for me).  I was tiptoeing the bike and felt like my elbows were in my boobs.  Hmmm, nothing like the Honda Rebel I trained on.  As I sat on the bike, in the garage, at the top of my driveway, I looked back over my shoulders and realized that I had to back my bike down a frickin mountain.

    Our house was elevated to maintain positive drainage which meant that the driveway had a decent incline.  Not like a mountain of course, but it felt every bit of it at the top of the driveway.  I’m brave, I’m stubborn, I’m stupid, hey I’m down the driveway and onto the street.  Exhilarated by overcoming an intense fear of backing down the driveway, I was ready to roll.

    Click, first gear, release the break and roll back on the throttle,  moving forward, feet up and I was off.  Me, myself and the Super Glide.  Four houses down and I needed to make my first turn.  Holy Hannah in a hand basket, this bike feels waaaaay different.  I made the turn a little wide but there wasn’t any oncoming traffic, so it was okay.  I made another right into the first cul-de-sac of our subdivision. I knew that I had problems with the low and slow turns so I vowed to go up and down every cul-de-sac to practice.

    I made my turn, coaching myself in my head, “look to where you want to go”  “do NOT look at your front tire”, “maintain speed and go girl”.  Woo hoo, I did it.  Look at me I’m riding solo, I’m riding a big ass Harley all by myself.  Another right turn and then another right into the next cul-de-sac .  This isn’t bad at all, pretty awesome actually.

    This cul-de-sac was a little different, smaller, pitched and it had kids and cars all around it.  Not the clean circle of the last cul-de-sac .  I decided to take it slow and keep mindful of all that was around me.  Only I kept it too slow.  Do you know what happens when you don’t have enough speed?

    You end up like the TV show Laugh-in’s clown on the tricycle.  The bike, my confidence, my pride, myself, went down.  Fortunately I fell away from the bike, I picked myself, wiped off the road grime and surveyed my situation.  I watched liquid pour from the bike and knew that it can’t be good.  I tried lifting the bike myself, no go; 135 pound girl versus 650 pound bike, not happening.

    At times like this, you have to swallow your pride and start knocking on your neighbors door.  I finally ran into a gentleman who had a little experience riding.  He picked up my bike, rode it to my house and parked it in the garage.  I was eternally grateful and just as eternally embarrassed.  As a matter fact, I am blushing as I type this.

    I did about $500 worth of damage, had to have the bike trailed to the dealership…recount my story to the *gulp* mechanics (they only snickered in my presence and saved the whole hearted laughter for after I left).  I also had to call McGyver, double gulp!  Pride goeth before the fall…hell, mine went before, during and after!

    What did I learn?  Your first ride, on your first bike should not be solo and just because you bought a bike, it doesn’t mean that its ready for you to ride!


  • Mother Goose

    May 8, 2011 by Giggles

    Mother Goose (9)

    McGyver was driving down the river road this morning when he spotted some geese and their goslings.  He called me immediately and said “I don’t if you have a Mother’s Day post planned but there are some adorable yellow fluffy goslings you might want to photograph”.

    I slept in this morning (which felt great) but made me feel I was behind on my plans for the day…catching up on Google reader, gardening, getting posts ready and of course cooking a nice meal for Mother’s Day.  But sometimes you have to let the plans of the day fall away so you don’t miss out on another opportunity.

    With my camera (and new Nikkor 28mm to 300mm lens) in hand, I gathered the dogs and headed to the river road.  It was a delight watching the mother geese and their goslings.  It emphasized to me that motherhood is universal and to be cherished.

    Mother Goose (8)

    I haven’t caught up on my Google Reader, I haven’t got any posts ready for the week and I haven’t even started on dinner.  Matter fact the only thing that I’ve caught up on is my sleep and my appreciation for Mother’s Day.

    Mother Goose (10)

    Happy Mother’s Day to all the mother’s, human and otherwise.

    Mother Goose (2)Mother Goose (3)Mother Goose (4)

    Mother Goose (5)

    Mother Goose (6)

    Mother Goose (7)

    Mother Goose


  • Risotto Verde

    May 5, 2011 by Giggles

    Risotto Verde

    For all of you risotto lovers, have I got a treat for you!  I really didn’t intend to make this recipe, I intended on making Jen’s Spanish Rice with green enchilada sauce versus the red that I normally use.  I had everything I needed…except the rice.  Time to switch gears or go shopping.  I decided against shopping, instead I opted to peruse the pantry; I spotted my Arborio rice and had an ‘aha’ moment (did you see the light bulb go on?).

    Arborio rice loves liquid, done right, it soaks it up and plumps to a nice and tender, yet slightly chewy risotto with an uber creaminess that is simply divine.   It is probably the best rice in the world (in my book, it is).  If you haven’t tried risotto, I urge you, no I implore, I beg you to try it, you’ll fall in love.  If you are a risotto fanatic, you simply must add this one to your repertoire.

    Now pour yourself a nice Margarita and enjoy Cinco de Mayo!

    Recipe

    Risotto Verde

    • 1 cup Arborio (risotto) rice
    • 2 tbsp. olive oil
    • 2 tbsp. butter
    • 1/2 cup chopped onion
    • 1 jalapeno, minced (seeds removed if you like it milder)
    • 2 cloves garlic, minced
    • 1 to 2 tsp. cumin (I like cumin, I used 2)
    • 10 oz. cans green (Verde) enchilada sauce
    • 14 0z. chicken broth
    • 1/4 cup cilantro (chopped), optional
    • Salt to taste

    In a large Dutch oven or other heavy bottomed pot, heat oil and butter over medium.  Sauté onion and jalapeno until the onion is tender, about 3 minutes.  Add garlic and the rice and sauté for another 2 minutes.  Add the cumin, cook for 30 more seconds or until it becomes aromatic.

    Mix the enchilada sauce and chicken broth.  Add 1 cup of the enchilada sauce/broth mixture, cook, stirring frequently until all the liquid is absorb.  Add the remaining sauce/broth mixture 1 cup at a time, stirring until each cup of liquid is absorbed before add the next about 20 minutes.  Stir in cilantro if desired.


    Click to Print a Recipe Card


  • ©2010 The Kitchen Witch Blog - All Rights Reserved
    Website Designed and Developed by Shortgrass Web Development